Burlap Bed Skirt

Hi Friends!

This post absolutely has nothing to do with school...but one of my BIG to-do's this summer has been to get our house semi- decorated. If you remember we moved in November. The middle of the school year {before the holidays!} is not the ideal time to move lol! So...I've had lists of things I want to get done/ organized / decorated for our house that I just didn't have time for during the year. My next goal is to tackle our master bedroom...we got a new duvet cover (it had been 6 years people!!) and it inspired me to really focus on our room. I saw this burlap bed skirt when I searched on Pinterest and became obsessed! So...I made this little tutorial for you guys if you're interested in making one for yourself! It's SO easy and NO sew!!
Step 1: Gather your materials. We have a king size bed and I measured each edge- they were roughly 7 feet each. I got 4 yards of burlap (4x3 feet= 12 feet (but then you un-fold the yard and cut and it becomes 24 feet. perfect!) The burlap was 2.99/yd and I used a 40% off coupon and it ended up being less that $10. I already own a craft staple gun and staples, so I didn't have to buy anything other than the burlap. :)
Step 2: I did this a little backwards. I ironed first...but I'm telling you now- cut your material THEN iron- by the time I had it all cut post-ironing, it had gotten wrinkly again.

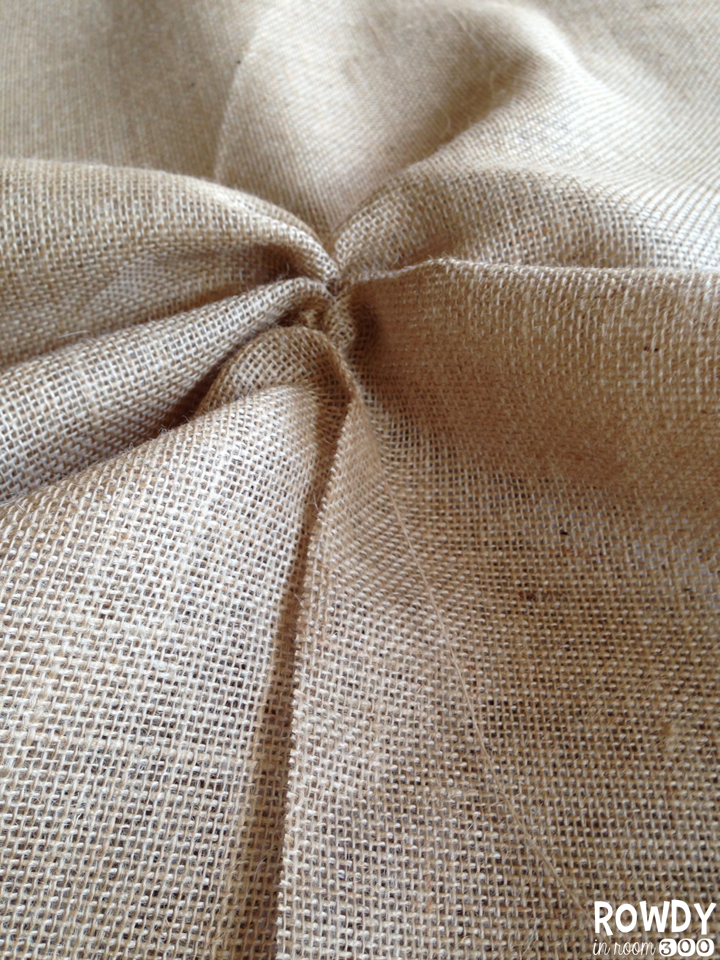
Do you know the burlap trick?! I snipped the burlap a teeny tiny bit where the fold was from being folded in half on the bolt. 
Once you make that little snip, grab one of the threads that run down your burlap (where you will want the guide to be for a straight line.) Pull the thread until the burlap gathers. 
Once you pull that thread out, you will have a perfect guide for a straight cut. Don't measure it! That's crazy and burlap is made to look imperfect :) Then, cut your fabric in half all along that line.
Step 3: NOW you iron it. It doesn't have to be perfect, you just don't want those hard creases to be in the final product.
Step 4: It's time to staple!! On the websites I found, it said to use bed skirt pins..but, let's be honest here. Ain't nobody got time for that! That would take sooooooo long, and I tested it out- the staples pull out of the box spring SUPER easy. When we're tired of it we'll just have to give a little tug and pull out the burlap. No problem.
Start at one corner and fold the burlap over. Staple. Go a few inches over, pinch the fabric, fold it over, and staple again. Repeat. and repeat. You might want a good show on while you're doing this. I was watching Hoda and Kathie Lee {guilty pleasure in the summer!} and it took me most of the hour to complete the whole thing from start to finish.
If you run out of the strip that you are using, just fold the next piece over, staple, and begin with the next piece. Can you see where I started a new piece right before the corner? Didn't think so ;) 
Just continue all the way around! I didn't have to worry about the bottom because of the type of frame we have- but I love the look of the un-finished bottom of the burlap, too, if you choose. Don't you just love it?! I'm officially obsessed. Now my next project is to find some burlap throw pillows for our bed! Oh, and all the naked walls, too :P

Hop on over to Tara's blog for the rest of this week's Monday Made Its!! 
{after you leave me some love, of course!}
http://4thgradefrolics.blogspot.com/2014/06/monday-made-it-summer-week-5.html

17

Guided Reading: Phonics

So, I posted on my Facebook page the other day asking what your favorite part of guided reading is- I had SO many people say that it's the "aha" moment and seeing our kiddos go from struggling to excelling. {isn't that why we all got into teaching in the first place?! Can I get an "amen!"} Well..that absolutely is my favorite part, too- seeing the progress over a period of time is AMAZING! 

I've been thinking a lot this summer about how I can improve my guided reading block and I have been working really hard on this Guided Reading: Step by Step Phonics pack. I have included the phonics steps that we K teachers will touch over the year in guided reading!
http://www.teacherspayteachers.com/Product/Guided-Reading-Step-by-Step-Phonics-for-Kindergarten-1295475

This packet is discounted through the weekend ONLY! Snag your copy up before it goes up to $18 for the rest of the school year. Click HERE to check it out!

3

How do I use my clip art in the Silhouette?!

I posted a picture on Instagram on Tuesday of my kid's personalized cups that I made for them to use this summer- there are so many times we are at the park with friends, at gymnastics, etc. that it is so nice to have a cup that is labeled so no one is confused about which cup is theirs!

I had so many questions about how to use cute clip art in your Silhouette...so I made a video for you! No laughing at my accent, promise?!

 
If you'd like to purchase Nikki's ADORABLE clipart, click HERE. I have permission from Nikki to post this video- I am not making the cups for sale- I just don't have the time!  I posted this little tutorial so you can make one for yourself!
http://www.teacherspayteachers.com/Store/Melonheadz
26

Monday Made It!

Good morning friends!
I'm *finally* linking up with my friend Tara for her Monday Made It linky. I'm telling you, people, I look forward to this linky ALL year. When the school year comes around I just don't have time to craft like I like to. Also, we moved into a new house this year and I have had ZERO time to decorate. So, guess what I will be doing this summer?!?!

I've already been pinning like crazy!

So...I only got around to doing 1 craft this week. I had many more on my list, but we had dentist appointments and dance recitals and summer sun to soak up!

I had reallllllly wanted a chalkboard above our mantle for a long time. I made one using a picture frame and chalkboard paint at Spring break. It was fabulous! It's a 2-day process because of dry time. I waited patiently, found the quote I wanted to write and then began! I was so excited! Then....I wasn't really thinking that I was writing ON GLASS and I leaned on the glass...just the tiniest little bit and CRACK!
can you see the crack? So sad! I didn't have time to remake the chalkboard at spring break, (it's a 2-day process, people!) so I just squished the glass together the best that I could! You couldn't even tell when it was up on the mantle. :D
So, for summer my first project was to fix the broken glass piece. This time I bought a replacement MIRROR. They are MUCH thicker than the glass and can handle a lot more pressure from writing. You can buy just a mirror in picture-frame size by the wall frames in Hobby Lobby. I used a 40% off coupon so it was a $7 fix. I spray painted the back of the mirror- the front was beveled which I did not want on my chalk board, so I just flipped it over. That way, I figure if I ever get tired of the chalkboard I can easily flip it over and use as a mirror.
Ahhhh...a fresh new chalk board!
 Here's the finished look. I love it! I can't wait to change the quotes out now as the season change. And I'm getting and itch to make, like, 7 more of them and place them throughout the house!!
Head over to Tara's blog to check out the rest of the Made It's! I will be back next week!!
http://4thgradefrolics.blogspot.com/2014/06/monday-made-it-summer-weekly-2.html

10

Improving listening skills

I've been working on a guided reading pack that I hope to have out in the next month or so and as I was working I kept thinking "Luke could do this!" It's so exciting as a teacher to be able to use my expertise at home, also! Especially when we're at home all summer!

Luke is 3 1/2...he's a typical BOY. He likes anything that has to do with  messes, dirt, trucks, tractors, games, sports, and the list could go on! He is high energy and doesn't. ever. stop! I hear boys are this way.

Ella knew all her letters and sounds by 2 1/2. NO JOKE. We didn't even have to "teach" them to her. She just picked up on it as we read, watched Word World, did puzzles and such. Luke...notsomuch. He's just not interested in letters and reading like Ella was. I by no means feel like he is behind, but I want him to have a solid foundation to build upon.

So I created this little game...it's nothing too exciting or ground breaking but it really helps with LISTENING. What toddler/ preschooler doesn't need help with their listening skills?!
Listening is the FIRST step to phonological awareness. Phonological awareness (PA) is an awareness of sounds and how they work. Vaughn, from "Research-based methods of Reading Instruction" states: "Children who enter school with PA have a very HIGH likelihood of learning to read successfully. Children who lack PA have great difficulty learning to read. Obviously children who come to school without PA need to develop it!"

Well, obviously I'm going to do everything I can to ensure that my babies are good readers and love to read. Making reading games FUN at this age is so so important! So I created this little animal sound game. Phonemic Awareness is about the SOUNDS and is all auditory. And what child doesn't love animal sounds?!
I printed out THESE animal cards, laminated, and cut them. I placed them all face up so that Luke could see them. I asked him what each animal is and what noise they make first. Now for the fun part...momma made the sound and Luke had to slap the correct card. We played this game with sister. Maybe if your child is not competitive or not a toddler just a sweetheart, then you could play the competitive version. {The first kid to slap it gets to keep the card} We tried that version and it went something like this:
LOL. Well, that's life with a toddler, right?!
You could do different variations of the game where you say multiple sounds "baaaa, mooo, quack" and your child will have to slap the first, middle, last sound they heard, etc. The possibilities are endless!
I hope you can use this with your kids- and those struggling little babies at the beginning of the year, too! This is a great game for guided reading! Let me know if you snag these up!

4

Life: Organized

Morning you guys!

Y'all went bananas for my last post so I added another page to the organization pack that includes a "school projects" slot for those of you who are non-teacher bloggers. Thought that would make you happy :) Click on the picture to head over to TpT and re-download the freebie!
http://www.teacherspayteachers.com/Product/Stay-Organized-Summer-FREE-calendar-and-checklists-252983

While I was at it, I made a weekly meal plan sheet that you can GRAB HERE for free!
The hubs and I are really trying to eat at home a lot more...and what perfect time to do this than the summer?! I actually will have time to make full meals {as long as we don't stay too late at the pool!}

The meals that I have written down on my plan for this week are from Bless This Mess. I just discovered her blog and I am LOVING it!

The shopping list behind my weekly plan is from my good friend Jen over at Teacher By the Beach. Click HERE to snag up her shopping list planner. I love it!


11
Back to Top