Showing posts with label crafts. Show all posts

Father's Day Gifts

Happy Monday, friends!
I'm joining my friend Tara for Monday Made It again! This week I made coasters for my husband, dad, and father-in-law for Father's Day. I made these with my students also before school let out but I was too busy to take pictures! One of my teammates has made these in the past with students and I *loved* the idea....they turn out so cute!
I bought some 4x4 white porcelain tiles from Lowes for 16 cents a piece - this project is totally economical for making with your class! I have 22 students and it was just around $8 for my total cost...mostly because I am a craft hoarder and had most of the material on hand. 

I took pictures of my students (and then later, my kids) against a solid background - for my kids I used the side of our house and I love how the brick looks in the background! I wrote "My Dad Rocks!" on a little chalkboard that my kids held in the picture. I printed the pictures 4x6 and then cut them down to 4x4. 4x4 tiles are a teeny bit bigger than 4x4 so there will be a perfect little white frame around the pictures. 
 Put a thin layer of Mod Podge on the tile and then place your picture on top. Wait a second before putting the top layer of Mod Podge on so the picture doesn't slide around. You will want to do 2 coats of Mod Podge on top - make sure each coat is dry before beginning the next!
 After the Mod Podge layers are dry, take the coasters outside and spray paint over the tiles with clear acrylic, enamel, or polyurethane. This will prevent the pictures from getting water damaged! After the tiles have dried, you'll want to place them somewhere where the clearcoat can air out for at least a day to harden.
 Once they're all dry, place sticky felt dots (like the kind you put under furniture so it doesn't scratch) on each corner of the tiles. (I forgot to take a picture!)
 Perfect little gifts for any dad around! 
Hop over to Tara's blog to check out the rest of the Monday Made Its this week! 

11

Motivation Marbles

Happy first Monday in June, you guys!
I'm happy to be guest posting over at my dear friend Tara's blog today for Monday Made It! MMI is one of my very favorite summer traditions so I'm excited to get the ball rolling for summer starting. Here's a little sneak peek of what I crafted this week. Hop over to Tara's blog to read more! {and snag up those cute little labels!}


5

DIY Burlap Bunting - great teacher gift!

Happy Monday, y'all!

I posted a few pictures on my Instagram account over the weekend of a little bunting that I made to decorate for fall in my house. I had so many requests for a tutorial that of course I obliged! :)

Seriously...this is the EASIEST thing ever and it looks fabulous with little effort! This would be perfect as a teacher gift with the teacher's name painted on it. Now...my OCD friends who have to have everything just so...beware when you're using burlap. It is a little difficult to cut perfectly so just let it go...take a deep breath...it will look great in the end!
You will need: 
-burlap in 2 different colors or burlap ribbon {I had scraps...I didn't even use 1/8th of a yard}
(this ribbon was from Hobby Lobby- I used it for another project a while back so I had it in my closet but I got it 1/2 off when I bought it)
-twine
-plastic needle
-hot glue, scissors, paint of your choice.
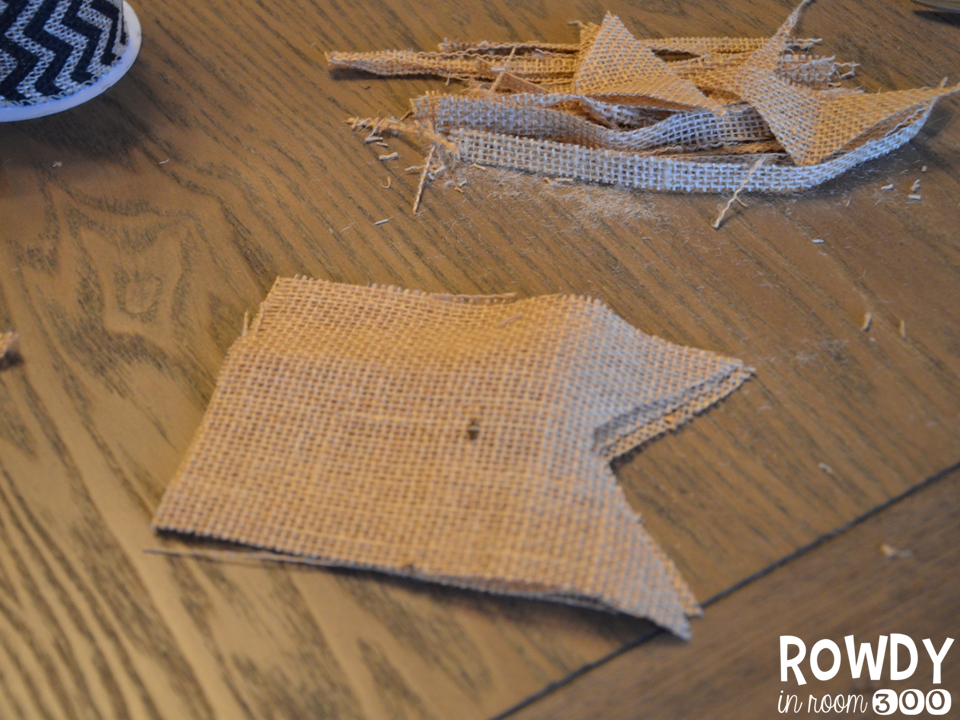
Now...to the fun part..cutting your burlap!!! I taught you a trick to cut burlap in this tutorial but I don't use it when I cut small pieces...so take a deep breath, sister. You've got this. Repeat after me. It does not have to be perfect! I didn't use a pattern because I'm not the measuring type...but if you need one, click HERE to snag mine up.
I cut out the rectangles first and then went back and trimmed the edges that were super far off. {just eyeball it!} eh hemm.. I had a few that were far from perfect.
Next, cut out the triangle shape for the bunting.
Follow the same process for the coordinating burlap....if you use the burlap ribbon it is much easier to work with. It's more stiff and cuts WAY easier!
If you are using the template, you don't need to follow this step. I didn't, so I had to fold my burlap in half to cut the triangles out at about the right size.  If you are going to paint anything on the top layer, this is the time to do it! Just place it on top of a piece of paper to be sure it doesn't bleed through.
Use a thin line of hot glue to tack the top bunting to the bottom bunting.
Line your bunting pieces up the way you want to string them. Thread your needle with the twine.
Thread the twine in and out of the bunting. Leave as much or as little space between each piece.
Hang up and enjoy!
Now head over to Tara's linky party and see all the other fun crafts this week!!
http://4thgradefrolics.blogspot.com/2014/10/monday-made-it-october.html

6

How do I use my clip art in the Silhouette?!

I posted a picture on Instagram on Tuesday of my kid's personalized cups that I made for them to use this summer- there are so many times we are at the park with friends, at gymnastics, etc. that it is so nice to have a cup that is labeled so no one is confused about which cup is theirs!

I had so many questions about how to use cute clip art in your Silhouette...so I made a video for you! No laughing at my accent, promise?!

 
If you'd like to purchase Nikki's ADORABLE clipart, click HERE. I have permission from Nikki to post this video- I am not making the cups for sale- I just don't have the time!  I posted this little tutorial so you can make one for yourself!
http://www.teacherspayteachers.com/Store/Melonheadz
26

Crafting in the classroom...life hack!


So, I love crafting in my classroom just as much as the next teacher but I always end up with a million models that I make year after year and then eventually I laminate and file away to use as an example for the next year.

Then I had a light bulb moment (and excuse me if you have been doing this for years! lol!) Rather than re-make a new example every year, if I had all the pieces ready so I could still go step by step and not have to re-cut the pieces every year it would make life SO much easier!

Maybe you're one of those super-duper-prepared teachers that I  really would like to be and all your pieces are cut out and waiting for you in a nice bag. I'm not. I pre-plan, don't get me wrong. But let's be honest here. I usually end up modeling and making my sample at the same time.

So, as I was walking the room and monitoring my students walking around with scissors in my hand cutting the pieces this week while we made these TLC penguins I was really trying to think of a better way to go about this!
The most readily available thing that I could think of was Velcro! Don't you love the stuff?! So, after cutting all my pieces out I just placed Velcro on the back of each little piece. This way I can model, go step by step, and help students more easily. Plus, when we go to make the penguin next year- it will all be ready for me!
 Another tip- Target's Up&Up brand gallon sized bags are PERFECT for holding materials like this. You can fit copy paper in there and zip them up all the way! Amazing!

{I just had to show off Ella's writing with this project. So proud of her writing!}
So, are there any especially amazing life hacks that I need to know about that are invaluable in your classroom?! Please share!!


about
4

Do you Cameo?!


Hi friends!
Happy Thanksgiving! I hope you're having a wonderful day spent with family! I'm thankful for so many things, but mainly these special people: 
{photo credit to our fabulous photographer Heather!}

So after turkey day today I'm planning on heading out to the shops...I just can't help it!! It's more about being around all the people and the hustle and bustle of the holidays. I don't have to buy a darn thing but I love being around all the people! {does that make me crazy?!}

So if you're in the mood to get your shopping on... read below!
I'm excited to be hosting a special holiday deal for you my fabulous fans!!
Have you been seeing all the ADORABLE things that can be made with a Silhouette Cameo?!
I've made a few things for my classroom {and Ella and her teacher}  that I absolutely adore! 

Ella's teacher's name is Mrs. Brown...she also has a slight fetish for all things Charlie Brown- so how cute did this sign turn out?! I used my Silhouette to cut the words and the chevron stripe. {have you ever tried to paint one of those boogers by hand?! Impossible even with tape! lol!} The Silhouetter made easy work of this project! Other than paint drying time, it took me no more than 15 minutes!

 Ella has a reader's theater that I made for her this summer. My original plan was to add on some type of pennant to the front..but.. it just never happened. I love this option even more, though!
So, if you're looking for an awesome Christmas present for that crafty person in your life- you NEED one of these! You don't have to buy cartridges separately for the fonts and graphics- just simply use what you have already on your computer {or peruse through the Silhouette store for tons of great graphics!} 

So head on over to Silhouette's website and use the code ROWDY to snag one of these great deals! The deal only last from today until December 8th so let your mom, aunt, husband or whoever know that it is on your wishlist. You can only get this deal using the code ROWDY at Silhouette's website!

           (1)          A Silhouette CAMEO®, Silhouette Studio® Designer Edition Software, a dust cover (the color is decided by Silhouette), a $25 download card, a hook, a scraper, a spatula, and a pick-me-up® tool for $229.99. Retail price for all of this would total $406.93 (over 40% savings!)
(2)          A Silhouette Portrait®, Silhouette Studio® Designer Edition Software, a dust cover (the color is decided by Silhouette), a $25 download card, a hook, a scraper, a spatula, and a pick-me-up® tool for $129.99. Retail price for all of this would total $286.93 (over 40% savings!)
(3)          A Silhouette CAMEO®, a Silhouette Portrait®, and two $25 download cards for $299.99. That’s right: If you buy a Silhouette CAMEO® at full price, you get two $25 download cards and a Silhouette Portrait® ABSOLUTELY FREE! Retail price for all of this would be $406.93 (over 40% savings!)
(4)          40% off consumable products at silhouetteamerica.com. This excludes machines, subscriptions, download and gift cards. Cannot be combined with any other offers. Rain checks not available.
(5)          FREE SHIPPING on orders over $25.

I hope the rest of your day is fabulous!!

about
2

Menu board!

Morning you guys!
I finally am back to some sort of "normal" since moving! Woohoo! 
I made this little menu board {if you're a facebook fan you were probably a part of the ribbon/ no ribbon debate!} and I have the tutorial all ready for you all!
I've been wanting to make one of these boards since last summer, but never found the time to make it! I'm SO super excited to have it all complete. No more "What am I going to make for dinner?!" around 5 o' clock. I modeled my board after this website's board. My original thought was to make a magnetic board but when I looked at making those bottle cap magnets, they were expensive! So, I opted for the cork board. My total cost was around $10- I already had the ribbon and cardstock, so I didn't have to buy any just for this project. 
click HERE to print the menu labels from my board.


So, you must be wondering about the meal planning cards. I used this template to make mine. {from the same blog that I modeled mine after} This lady is a genius! I didn't take a picture, but on the back of each meal are the ingredients that I would need to purchase (so, anything that is not a staple) to add to my shopping list. *swoon*

I hope you make one and it makes your life #somucheasier!
Photobucket Follow on Bloglovin
28
Back to Top